Setup basic CI/CD pipeline with GitHub Actions
Get Started With CI/CD Using GitHub Actions

A security guy with 5+ years of experience in web application and mobile pen-testing. My work has been acknowledged across the globe. I have worked with more than 300+ companies to secure them.
In today's fast-paced world, delivering software products quickly and efficiently has become a necessity. This is where Continuous Integration and Continuous Deployment (CI/CD) pipelines come into play. CI/CD pipelines are a set of practices and tools that allow developers to deliver code changes more frequently and reliably. In this blog post, we will learn how to set up a basic CI/CD pipeline with GitHub.
What is CI/CD?
Continuous Integration (CI) is a practice of automatically building and testing code changes whenever they are pushed to the code repository. Continuous Deployment (CD) is a practice of automatically deploying code changes to the production environment whenever they pass the CI process. Together, CI/CD pipelines provide an automated process for building, testing, and deploying code changes.
Setting up a Basic CI/CD Pipeline with GitHub
To set up a basic CI/CD pipeline with GitHub, you will need the following:
A GitHub account
A code repository on GitHub
A CI/CD tool (we will be using GitHub Actions)
What are the use cases of CI/CD in cybersecurity?

Almost every security professionals maintain a dedicated server for multiple purposes, It can be bug bounty, enumeration, POC assistance etc. but all of these can be troublesome if every time you had to SSH into the server and update your codes. With CI/CD you can design the entire deployment and how you want the server to behave right from your IDE which is very handy and easy to do.
I have seen people making autonomous recon tools entirely using the GitHub workflow so even that area can be explored.
Steps to set it up
I have used a very basic VPS server to set up a simple CI/CD pipeline, Firstly I SSHed into my VPS and did the steps below:
Generate an SSH key
ssh-keygen -t rsa -b 4096 -C "test@example.com"
Add the public key to the authorized keys
cat ~/.ssh/id_rsa.pub >> ~/.ssh/authorized_keys

#You can also copy the contents of id_rsa.pub to authorized_keys file
Copy the key
cat ~/.ssh/id_rsa
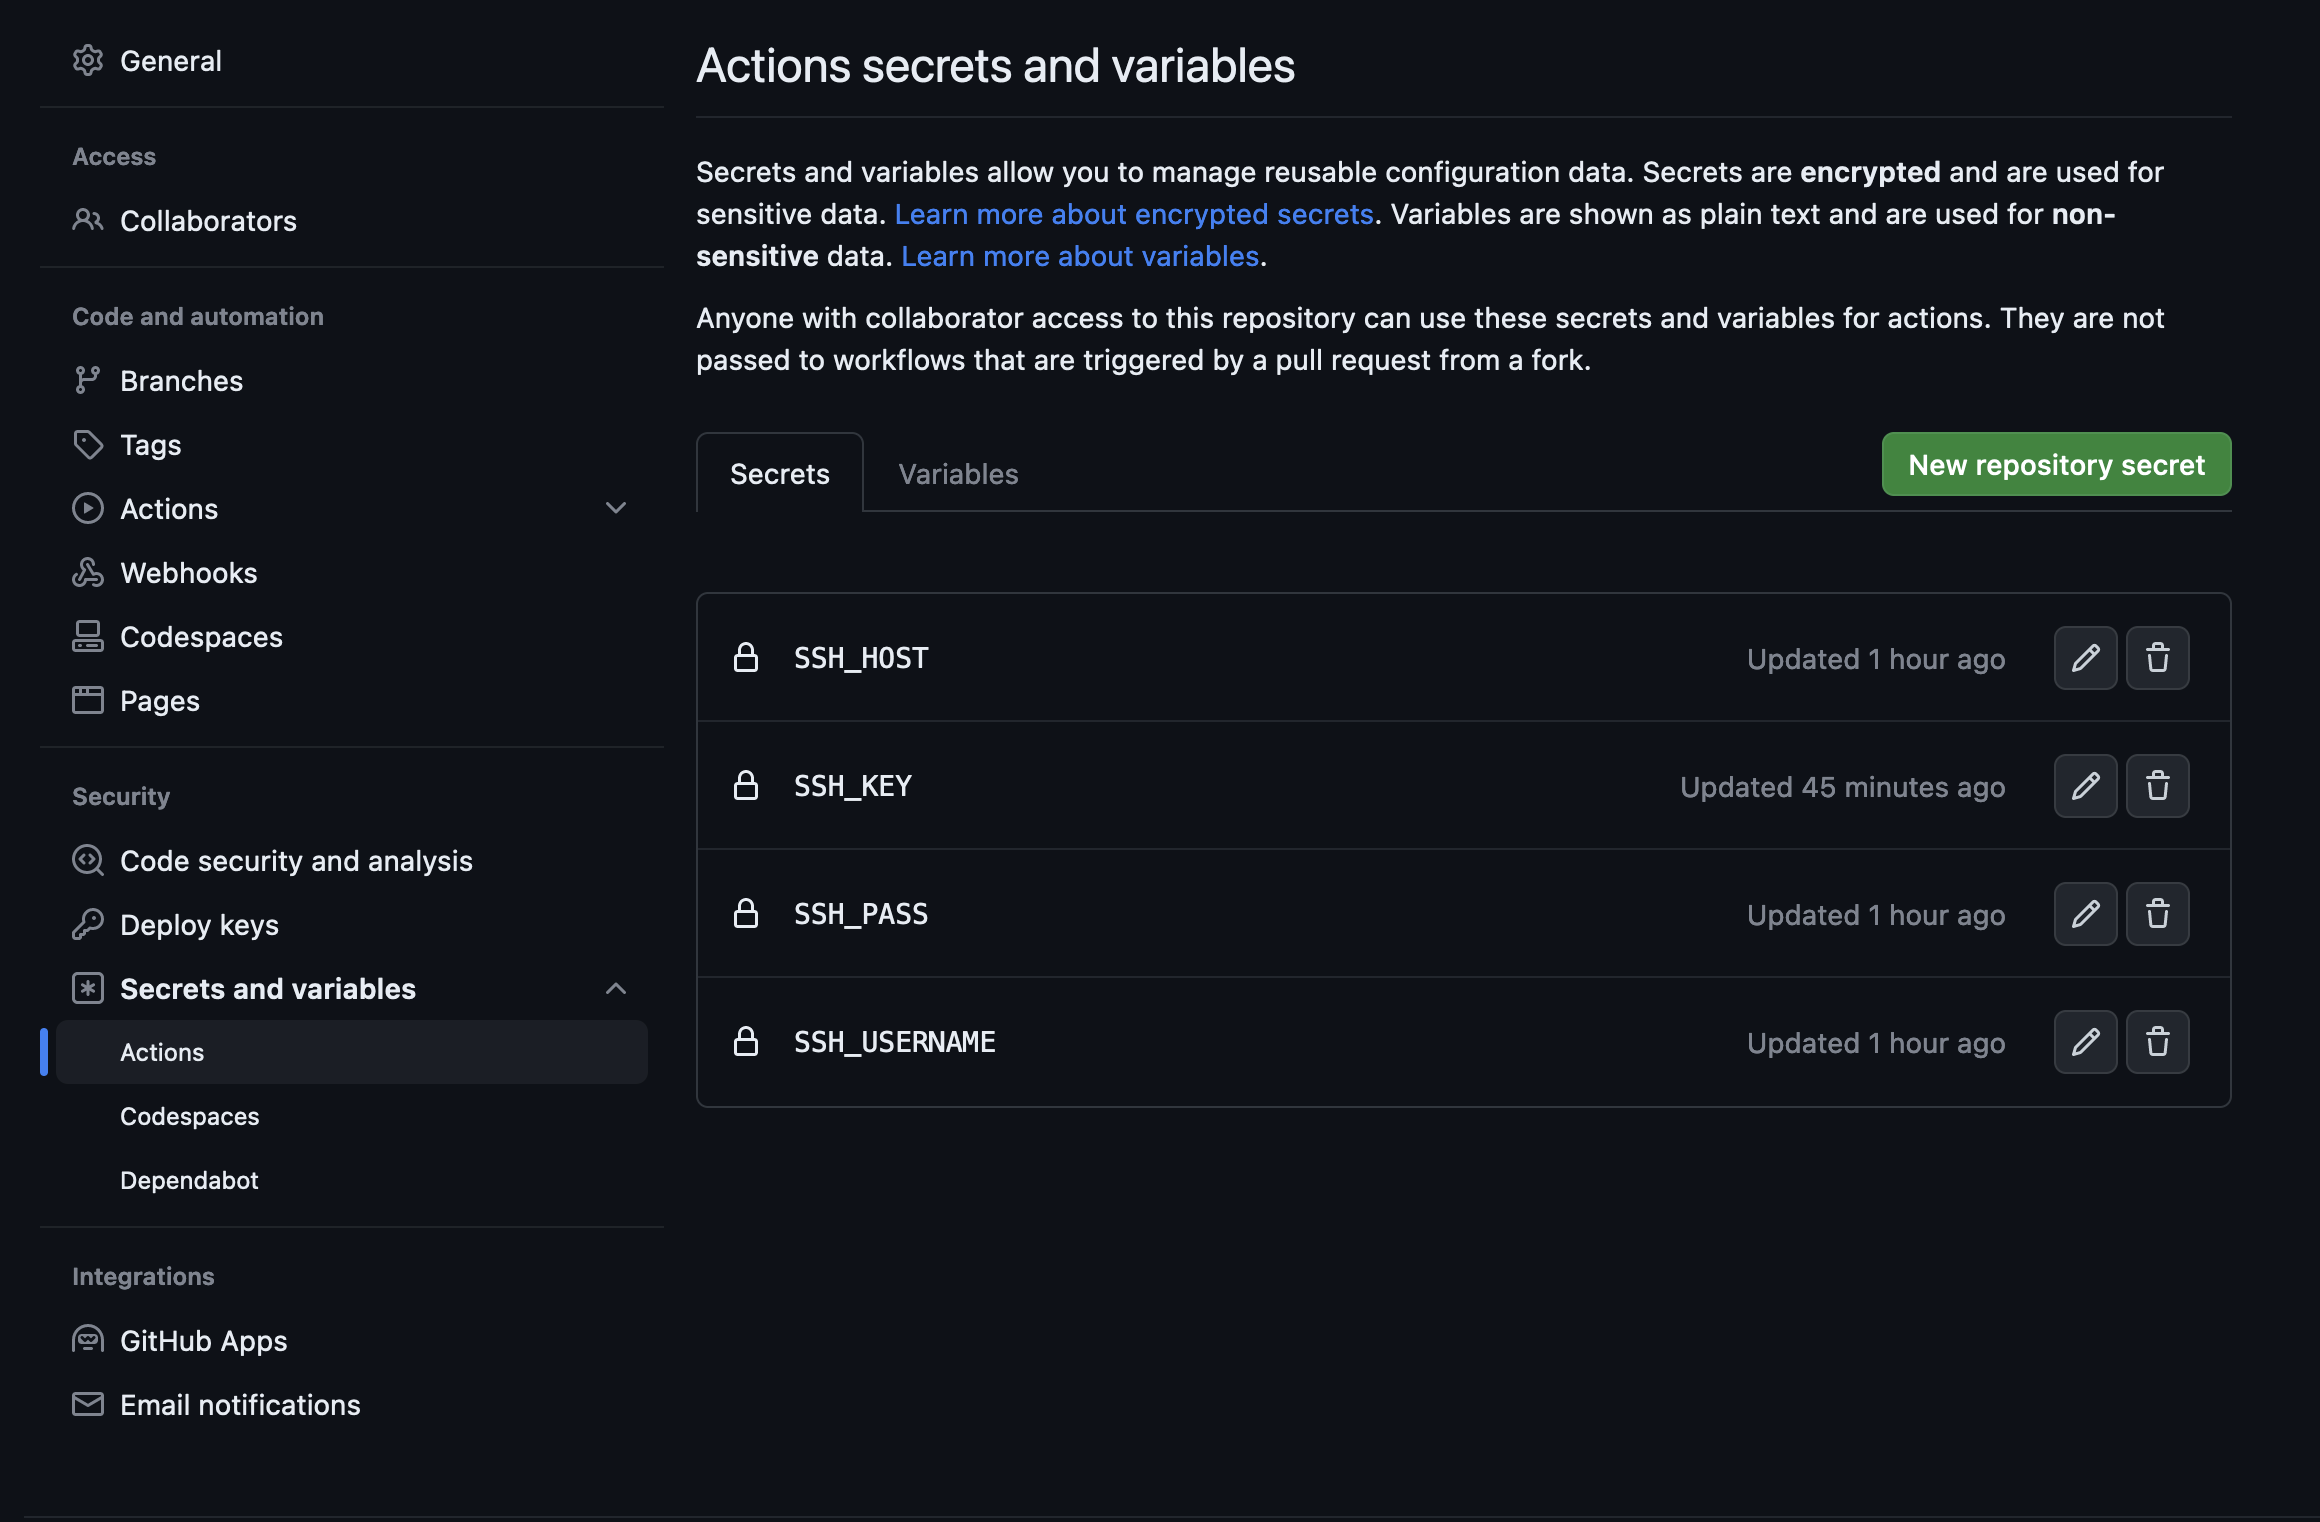
Go to the "Actions And Secrets Variable" page and setup all these values
SSH_USERNAME: set the key to the username you use to SSH into your VPS.
SSH_HOST: set the key to your hostname or ip address.
SSH_KEY: set the key to you copied contents from the command above.
SSH_PASS: set the password for the vps
Now navigate to "Actions" page and create a new workflow with this template, This template is to test if you can actually login to the VPS using Github Actions.
name: remote ssh command
on: [push]
jobs:

  build:
    name: Build
    runs-on: ubuntu-latest
    steps:
    - name: executing remote ssh commands using password
      uses: appleboy/ssh-action@v0.1.10
      with:
        host: ${{ secrets.SSH_HOST }}
        username: ${{ secrets.SSH_USERNAME }}
        password: ${{ secrets.SSH_PASSWORD }}
        key: ${{ secrets.SSH_KEY }}
        port: 22
        script: |
          whoami
If it's successful then you can go back to your VPS and set up your GitHub credentials there and now instead of "whoami" you can run GitHub operations such as "git pull" to always deploy your code and then run it using the particular command.
For deployment, such templates can be used and deploy your desired application.
name: Deploy Flask App

on:
  push:
    branches:
      - main

jobs:
  deploy:
    runs-on: ubuntu-latest

    steps:
      - name: Checkout code
        uses: actions/checkout@v2

      - name: Set up Python 3
        uses: actions/setup-python@v2
        with:
          python-version: 3.8

      - name: Install dependencies
        run: |
          python -m pip install --upgrade pip
          pip install -r requirements.txt

      - name: Build and test the app
        run: |
          python -m pytest
          python setup.py sdist bdist_wheel

      - name: Deploy to server
        uses: easingthemes/ssh-deploy@v2.1.1
        env:
          SSH_PRIVATE_KEY: ${{ secrets.SSH_KEY }}
          ARGS: "-rltgoDzvO --delete"
          SOURCE: "dist/*"
          REMOTE_HOST: ${{ secrets.SSH_HOST }}
          REMOTE_USER: ${{ secrets.SSH_USERNAME }}
          TARGET: "/var/www/flask_app"
If the repository is private, you will need to set up SSH keys for Git authentication. Here are the steps to follow:
- Generate an SSH key pair on your Ubuntu machine by running the following command in your terminal:
ssh-keygen -t rsa -b 4096 -C "your_email@example.com"This command will generate a public and private key pair in the
~/.sshdirectory on your machine.Add the SSH public key to your GitHub account by copying the public key to your clipboard:
cat ~/.ssh/id_rsa.pubThis command will print the contents of your public key to the terminal. Copy the entire output.
Then, go to your GitHub account settings, select "SSH and GPG keys," and click "New SSH key." Paste the contents of your public key into the "Key" field and click "Add SSH key."
Configure your SSH agent to store your private key:
  eval "$(ssh-agent -s)"
  ssh-add ~/.ssh/id_rsa
The first command will start the SSH agent, and the second command will add your private key to the agent.
Clone the private repository using the SSH URL:
git clone git@github.com:username/repository.gitReplace
usernamewith your GitHub username andrepositorywith the name of the repository you want to clone.Once the repository is cloned to your machine, you can perform a
git pullto fetch the latest changes from the remote repository:
 cd repository
 git pull
This command will update your local repository with the latest changes from the remote repository.
That's it! You should now be able to perform a git pull on your machine for the private repository.
![How I passed OSCP on the first attempt? [ Part 2 ]](/_next/image?url=https%3A%2F%2Fcdn.hashnode.com%2Fres%2Fhashnode%2Fimage%2Fupload%2Fv1686190683044%2F403df02f-7fd6-4229-b768-9b3ccbbbb123.avif&w=3840&q=75)
![How I passed OSCP on the first attempt? [ Part 1 ]](/_next/image?url=https%3A%2F%2Fcdn.hashnode.com%2Fres%2Fhashnode%2Fimage%2Fupload%2Fv1675787059447%2F54cf15e1-02f9-4f54-b80c-af67f51d1505.png&w=3840&q=75)